Introduction to LVP Waterproof Flooring
Understanding the nuances of flooring types is crucial for making an informed decision in home renovation projects. Among the myriad of options available, LVP waterproof flooring has gained significant attention in recent years. The combination of durability and aesthetics makes this flooring type an appealing choice for homeowners and designers alike. In this article, we will delve deeply into lvp waterproof flooring, exploring its features, benefits, installation processes, maintenance, and design options.
What is LVP Waterproof Flooring?
LVP, which stands for Luxury Vinyl Plank, is a synthetic flooring material designed to imitate the appearance of hardwood, stone, and tile, while offering enhanced durability and waterproof capabilities. Composed of multiple layers, including a waterproof core, LVP provides a reliable and visually appealing choice for various environments, especially in spaces vulnerable to moisture, such as kitchens and bathrooms. Unlike traditional vinyl flooring, which tends to come in sheets or tiles, LVP is specially crafted in planks to provide a more elegant and sophisticated appearance.
Key Benefits of LVP Waterproof Flooring
- Water Resistance: As the name suggests, LVP is waterproof, making it an ideal choice for areas prone to spills and moisture.
- Durability: LVP flooring is resistant to scratches, dents, and wear and tear, ensuring it maintains its appearance for many years.
- Easy Maintenance: Cleaning LVP involves simple sweeping and mopping, which makes maintenance hassle-free.
- Affordability: Compared to traditional hardwood, LVP offers a similar aesthetic at a fraction of the price.
- Versatile Design Options: LVP is available in various colors, textures, and patterns, allowing homeowners to customize their space easily.
How LVP Differs from Other Flooring Types
When comparing LVP to other flooring options like hardwood, laminate, and ceramic tile, several key differences emerge. Hardwood, while aesthetically pleasing, is susceptible to water damage and requires significant maintenance. Laminate offers similar aesthetics but lacks waterproof properties. Ceramic tiles are waterproof but can be cold and hard underfoot. LVP combines the best attributes of these materials—offering moisture resistance alongside comfort and warmth, making it a more suitable choice in various homes.
Installation Process for LVP Waterproof Flooring
Installing LVP flooring can be a rewarding DIY project or carried out by professionals. However, understanding the process is crucial for achieving the best results. Below is a detailed guide on how to install LVP.
Tools Required for Installation
Before starting the installation process, gather the following tools:
- Measuring tape
- Utility knife
- Ruler or straight edge
- Pull bar
- Tap tool (or rubber mallet)
- Underlayment (if necessary)
- Moisture barrier (if necessary)
- Broom or vacuum for cleaning
Step-by-Step Installation Guide
- Preparation: Begin by clearing the installation area and ensuring the subfloor is clean, dry, and level.
- Acclimation: Allow the planks to acclimate in the room where they will be installed for at least 48 hours.
- Underlayment: If required, install a moisture barrier or underlayment over the subfloor.
- Plank Layout: Plan your layout, ideally starting from the longest straight wall. Measure and mark your starting point.
- Cutting and Fitting Planks: Use your utility knife to cut planks to fit around corners and edges, ensuring a snug fit.
- Installing the Planks: Begin laying the first row of planks, clicking or locking them into place according to the manufacturer’s guidelines.
- Completing Rows: Continue laying rows, utilizing a pull bar and tap tool if necessary to ensure planks fit tightly together.
- Final Trimming: Once all planks are installed, trim any excess underlayment or barrier material from the edges.
- Finishing Touches: Install transitions, baseboards, and other finishing elements to complete the look.
Tips for a Professional Finish
To achieve a professional-looking installation of LVP flooring, consider the following tips:
- Ensure proper acclimation of planks to avoid expansion or contraction after installation.
- Use spacers around the perimeter to allow for natural swelling and shrinking.
- Maintain a consistent expansion gap (usually 1/4 inch) around all edges.
- Double-check measurements before cutting to prevent errors and waste.
- Install planks in a staggered pattern to enhance stability and aesthetics.
Maintaining Your LVP Waterproof Flooring
Known for its ease of maintenance, LVP waterproof flooring still requires regular care to ensure its longevity and beauty. Here are some best practices for maintaining your floors.
Cleaning Techniques for LVP Waterproof Flooring
Routine cleaning of LVP flooring involves:
- Regularly sweeping or vacuuming to remove dirt and debris.
- Mopping with a damp mop using a cleaner specifically designed for vinyl flooring.
- Avoiding harsh chemicals and abrasive tools that could damage the surface.
- Immediately cleaning up spills to prevent staining or slipping hazards.
Preventing Damage and Wear
To protect your LVP flooring from premature wear and damage:
- Use felt pads under furniture legs to prevent scratches.
- Avoid walking on LVP with high-heeled shoes or sports cleats that can dent the surface.
- Place area rugs in high-traffic zones to add protection and style.
- Maintain indoor humidity levels between 30 and 50 percent to prevent issues due to heat or moisture.
How to Restore Shine and Luster
Over time, LVP may lose some of its shine. To restore it, you can:
- Perform a thorough cleaning with mild soap and water, followed by a rinse and dry.
- Apply a vinyl floor polish specifically designed for LVP to renew the surface shine.
- Consult product guidelines for reapplication frequency to maintain an optimal appearance.
Design Ideas Incorporating LVP Waterproof Flooring
The versatility of LVP flooring extends beyond functionality, offering numerous design possibilities to enhance your home aesthetic.
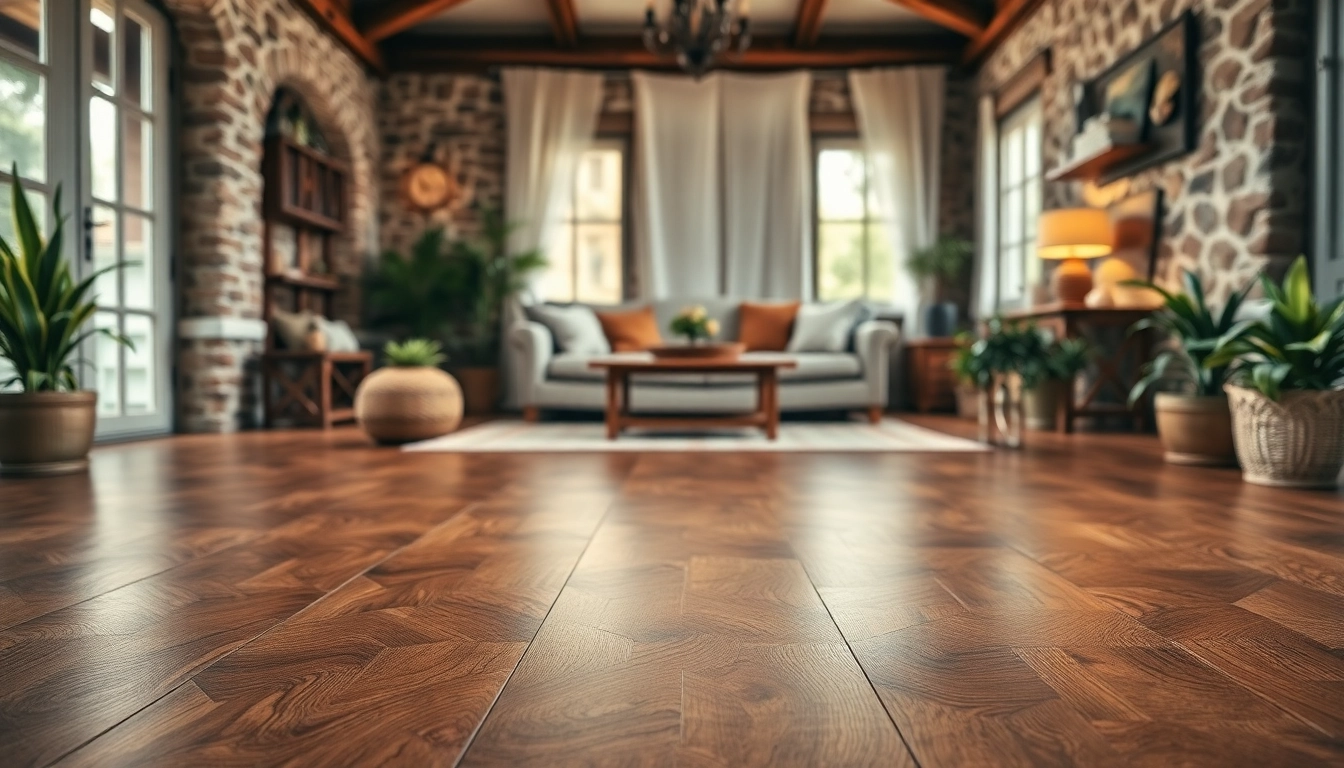
Choosing the Right Color and Texture
When selecting LVP flooring, consider your desired aesthetic by color and texture:
- Light colors can open space and provide a contemporary feel, whereas dark tones add warmth and sophistication.
- Textured planks can add depth and a natural feel to mimic authentic hardwood or stone.
- Consider the natural lighting and existing colors in your room to achieve a harmonious look.
Combining LVP with Other Materials
LVP can be beautifully paired with other flooring materials for a unique and trendy look:
- Combine LVP with ceramic tiles in entryways or bathrooms for an elegant transition.
- Use area rugs on LVP for additional color and texture, especially in living rooms.
- In open-concept designs, using different LVP styles can demarcate different functional areas.
Decorative Styles: Modern to Rustic
The adaptability of LVP flooring allows it to fit a range of decorative styles:
- For modern spaces, choose sleek, light-colored planks with a smooth finish.
- In rustic settings, opt for textured, darker, wood-look options to create a cozy atmosphere.
- Consider mixing patterns and colors within your LVP choices to achieve visual interest in eclectic designs.
FAQs About LVP Waterproof Flooring
Is LVP waterproof?
Yes, LVP is designed to be entirely waterproof, making it an excellent choice for moisture-prone areas like bathrooms and kitchens.
Can LVP be installed over existing flooring?
Typically, LVP can be installed over existing flooring, but ensure the surface is clean, level, and stable for optimal performance.
How long does LVP last?
With proper care, LVP can last 15 to 25 years, making it a durable flooring option for homeowners.
What is the best way to clean LVP?
The best way to clean LVP is to sweep or vacuum regularly and use a damp mop with a mild cleaner designed for vinyl surfaces.
Can I use LVP in bathrooms and kitchens?
Absolutely. LVP is waterproof and designed for use in moisture-heavy areas like bathrooms and kitchens, making it a great choice.